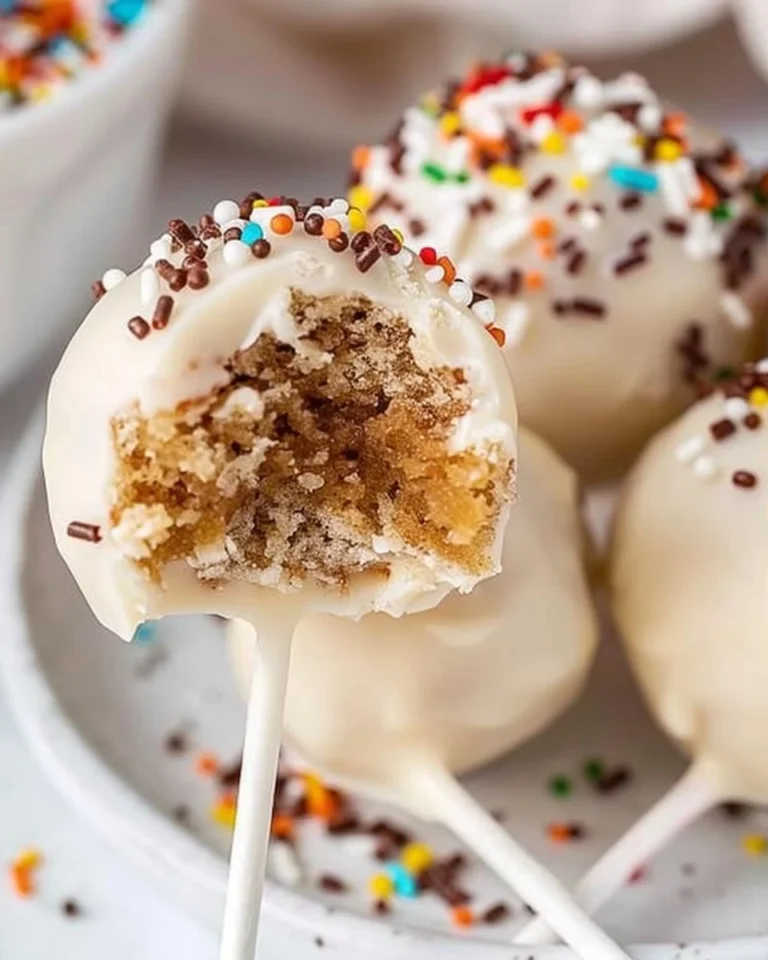
Indulge in Delight: Copycat Starbucks Cake Pop Recipe
If you’ve ever walked into a Starbucks and been tempted by those colorful, bite-sized cake pops lining the display, you’re not alone. These sweet treats are not just visually appealing; they carry a little magic of nostalgia and joy with every bite. Imagine sinking your teeth into one of these delightful delights from home—sound tempting? Well, you’re in for a treat! In this article, we’ll dive into a copycat Starbucks cake pop recipe that brings this charming café staple right to your kitchen. Get ready to impress your friends and family with these delectable desserts that are as fun to make as they are to eat!
Why You Should Make Cake Pops at Home
Making your own copycat Starbucks cake pops isn’t just about replicating the taste; it’s an opportunity to unleash your creativity and customize each pop to your liking. Here are some compelling reasons why you should whip up a batch:
- Customization: Choose your favorite flavors, colors, and toppings.
- Cost-effective: Making them at home can be more economical than purchasing them at Starbucks.
- Family Fun: Get the kids involved! Cake pop making is a fantastic activity for family bonding.
- Catering for Dietary Needs: Adjust ingredients to fit dietary restrictions or preferences.
By gaining control over the ingredients, your baking experience transforms into a joyful adventure. Ready to get started on your own cake pop creation? Let’s gather our supplies!
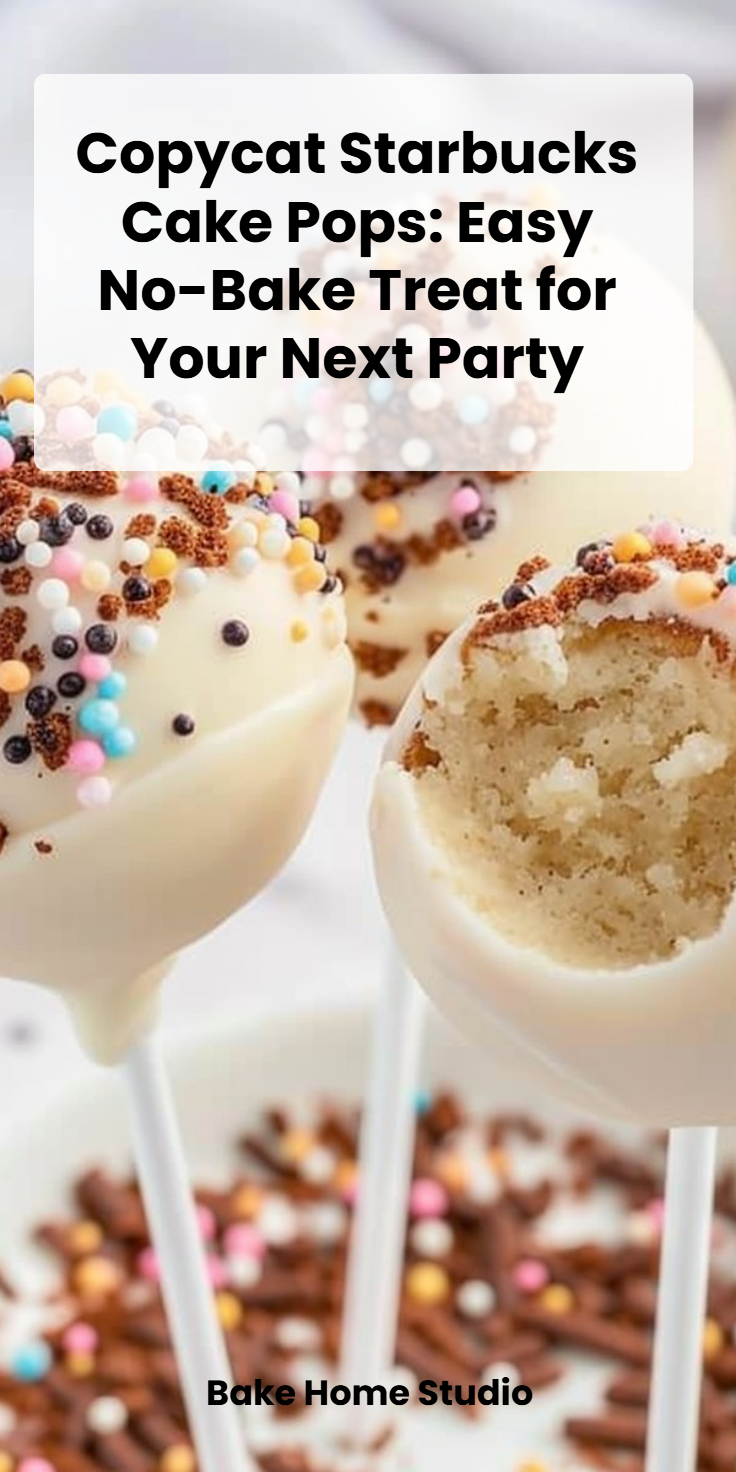
What You’ll Need for Your Cake Pops
Here’s a quick checklist of ingredients and tools to make the magic happen:
- 1 (15.25 oz) box vanilla cake mix (baked according to directions)
- 4 tablespoons salted butter (softened)
- 1 cup powdered sugar
- 1 tablespoon heavy cream (or milk)
- ½ teaspoon vanilla extract
- 24 cake pop sticks
- 12 ounces white chocolate (divided into 4 oz and 8 oz portions)
- Sprinkles of your choice
Make sure you have these items ready to go, and let’s get baking!
Create Your Cake Pops: A Step-by-Step Guide
Baking cake pops involves a few simple steps, but the results are truly delightful. Here’s how to make them:
1. Bake the Cake
Prepare the vanilla cake mix according to the package’s instructions. Once baked, let it cool completely in the pan.
2. Crumble the Cake
Once the cake is cool, crumble it into a large bowl using your hands. The finer the crumbs, the smoother the cake pops will be.
3. Mix in Frosting
In a separate bowl, combine the crumbled cake, softened butter, powdered sugar, heavy cream, and vanilla extract. Mix until you achieve a dough-like consistency. It should hold together when pressed without crumbling apart.
4. Shape the Pops
Using your hands, form small balls of the mixture, about 1 inch in diameter. Place them on a baking sheet lined with parchment paper.
5. Insert Sticks
Melt the 4 oz portion of white chocolate and dip the end of each cake pop stick into the melted chocolate before inserting it into each ball. This helps secure the stick in the pops.
6. Chill
Place the baking sheet in the fridge for about 30 minutes. This will firm up the cake pops, making them easier to coat.
7. Coat in Chocolate
Melt the remaining 8 oz of white chocolate. Dip each chilled cake pop into the melted chocolate, ensuring it’s fully coated. Allow excess chocolate to drip off.
8. Add Sprinkles
Before the chocolate hardens, sprinkle your chosen toppings over the pops.
9. Set and Enjoy
Insert the pops into a foam block or stand to allow the chocolate to set completely. Once hardened, they’re ready to be served and devoured!

Helpful Tips for Perfect Cake Pops
Making cake pops can come with its own set of challenges. Here are some expert tips to ensure you achieve that perfect, professional look:
- Don’t Over-Bake: Make sure the cake is moist, as overly dry cake can lead to crumbling pops.
- Consistency is Key: The cake-to-frosting ratio should be balanced. Too much frosting can make the pops overly sweet.
- Dip Correctly: When coating, swirl the pop around to avoid creating clumps.
- Use Quality Chocolate: Using good-quality melting chocolate can make a significant difference in taste and texture.
Fun Variations to Try
While this copycat Starbucks cake pop recipe focuses on vanilla, why not get adventurous? Here are some fun variations you can try:
- Red Velvet Cake Pops: Substitute vanilla cake for red velvet for a festive twist.
- Chocolate Cake Pops: Use chocolate cake mix instead for chocoholics.
- Flavored Coatings: Experiment with different types of chocolate coatings such as dark, milk, or even colored candy melts.
- Different Sprinkles: Mix it up with seasonal sprinkles or edible glitter to match any occasion.
Common Mistakes to Avoid
Even the most seasoned bakers can make mistakes. Here are some common pitfalls to watch out for:
- Cakes Not Cooled Properly: If the cake is still warm, it can melt the coating.
- Too Large or Small Pops: Aim for uniformity in size for an appealing presentation.
- Neglecting the Chill: Skipping the refrigeration step might cause your pops to fall apart during coating.
Storing Your Cake Pops
After you’ve put in all that hard work, you want to make sure your cake pops stay fresh. Store them in an airtight container at room temperature for up to 3 days. If you need them to last longer, consider refrigerating them, although this may affect the texture.
Frequently Asked Questions
Q: How do I make a copycat Starbucks cake pop recipe?
A: To make a copycat Starbucks cake pop recipe, crumbles of cake are mixed with frosting, shaped into balls, dipped in chocolate, and decorated with sprinkles. For a detailed guide, refer to our step-by-step instructions!
Q: Can I freeze cake pops?
A: Yes, you can freeze cake pops! Just wrap each pop in plastic wrap and place them in an airtight container for up to 1 month.
Q: What’s the best way to melt chocolate for coating?
A: The best way to melt chocolate is to use a microwave-safe bowl and heat it in 30-second intervals, stirring in between until smooth, or use a double boiler.
Q: How can I customize my cake pops?
A: You can customize your cake pops by changing the flavor of the cake, using different coatings such as colored candy melts, and choosing various sprinkles or toppings.
Q: What tools do I need for making cake pops?
A: To make cake pops, you’ll need a baking pan, mixing bowls, measuring cups, cake pop sticks, and possibly a foam block for easy drying.
A Sweet Conclusion
Bringing the enchanting world of Starbucks cake pops into your kitchen can be a rewarding experience. Not only do you get to enjoy these delightful treats, but you also create cherished memories with your loved ones along the way. This copycat Starbucks cake pop recipe is just the beginning—let your creativity soar and enjoy the smiles that come with each delicious bite! Whether you’re making them for a celebration or just a cozy weekend project, cake pops are sure to impress. Happy baking!

Cake Pops
Ingredients
Method
- Bake the vanilla cake mix according to the package's instructions. Once baked, let it cool completely in the pan.
- Once the cake is cool, crumble it into a large bowl using your hands. The finer the crumbs, the smoother the cake pops will be.
- In a separate bowl, combine the crumbled cake, softened butter, powdered sugar, heavy cream, and vanilla extract. Mix until you achieve a dough-like consistency that holds together when pressed.
- Using your hands, form small balls of the mixture, about 1 inch in diameter. Place them on a baking sheet lined with parchment paper.
- Melt the 4 oz portion of white chocolate and dip the end of each cake pop stick into the melted chocolate before inserting it into each ball.
- Place the baking sheet in the fridge for about 30 minutes to firm up the cake pops.
- Melt the remaining 8 oz of white chocolate. Dip each chilled cake pop into the melted chocolate, ensuring it’s fully coated.
- Allow excess chocolate to drip off, then sprinkle your chosen toppings over the pops before the chocolate hardens.
- Insert the pops into a foam block or stand to allow the chocolate to set completely.
- Once hardened, the cake pops are ready to be served and enjoyed!